Create Workspace
This guide provides step-by-step instructions on how to create a workspace, enabling you to efficiently organize your projects.
Before creating a workspace, ensure you are signed in and have the necessary permissions.
Create Workspace
-
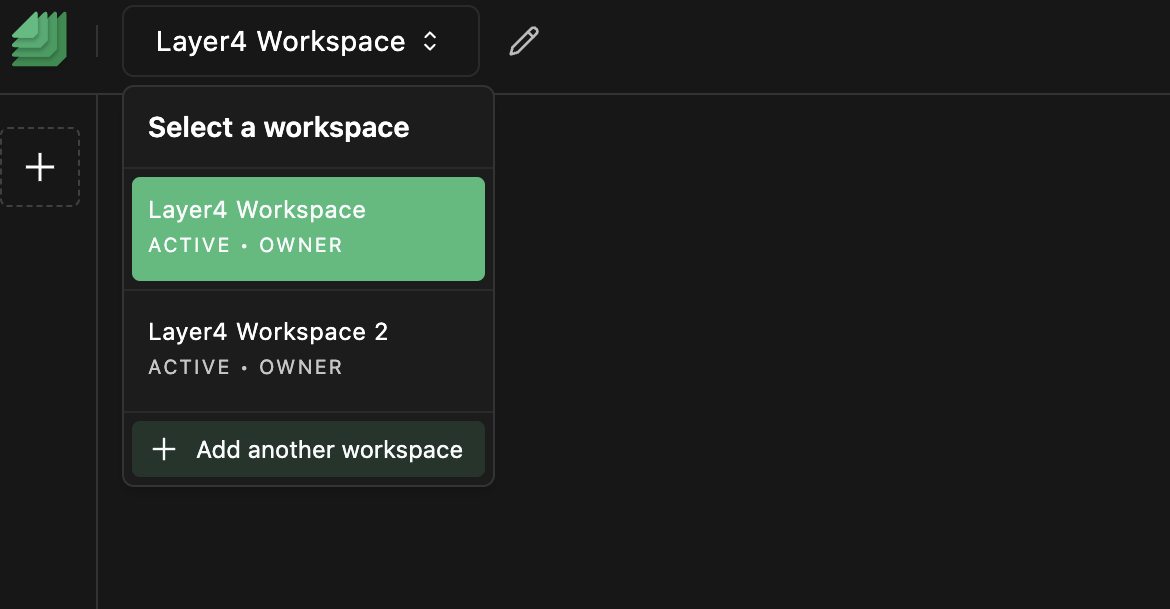
Select Workspace: Begin by clicking on the "Select Workspace" option located in the top left corner of the page.
-
Add Another Workspace: In the dropdown menu, click on the "Add another workspace" button.
-
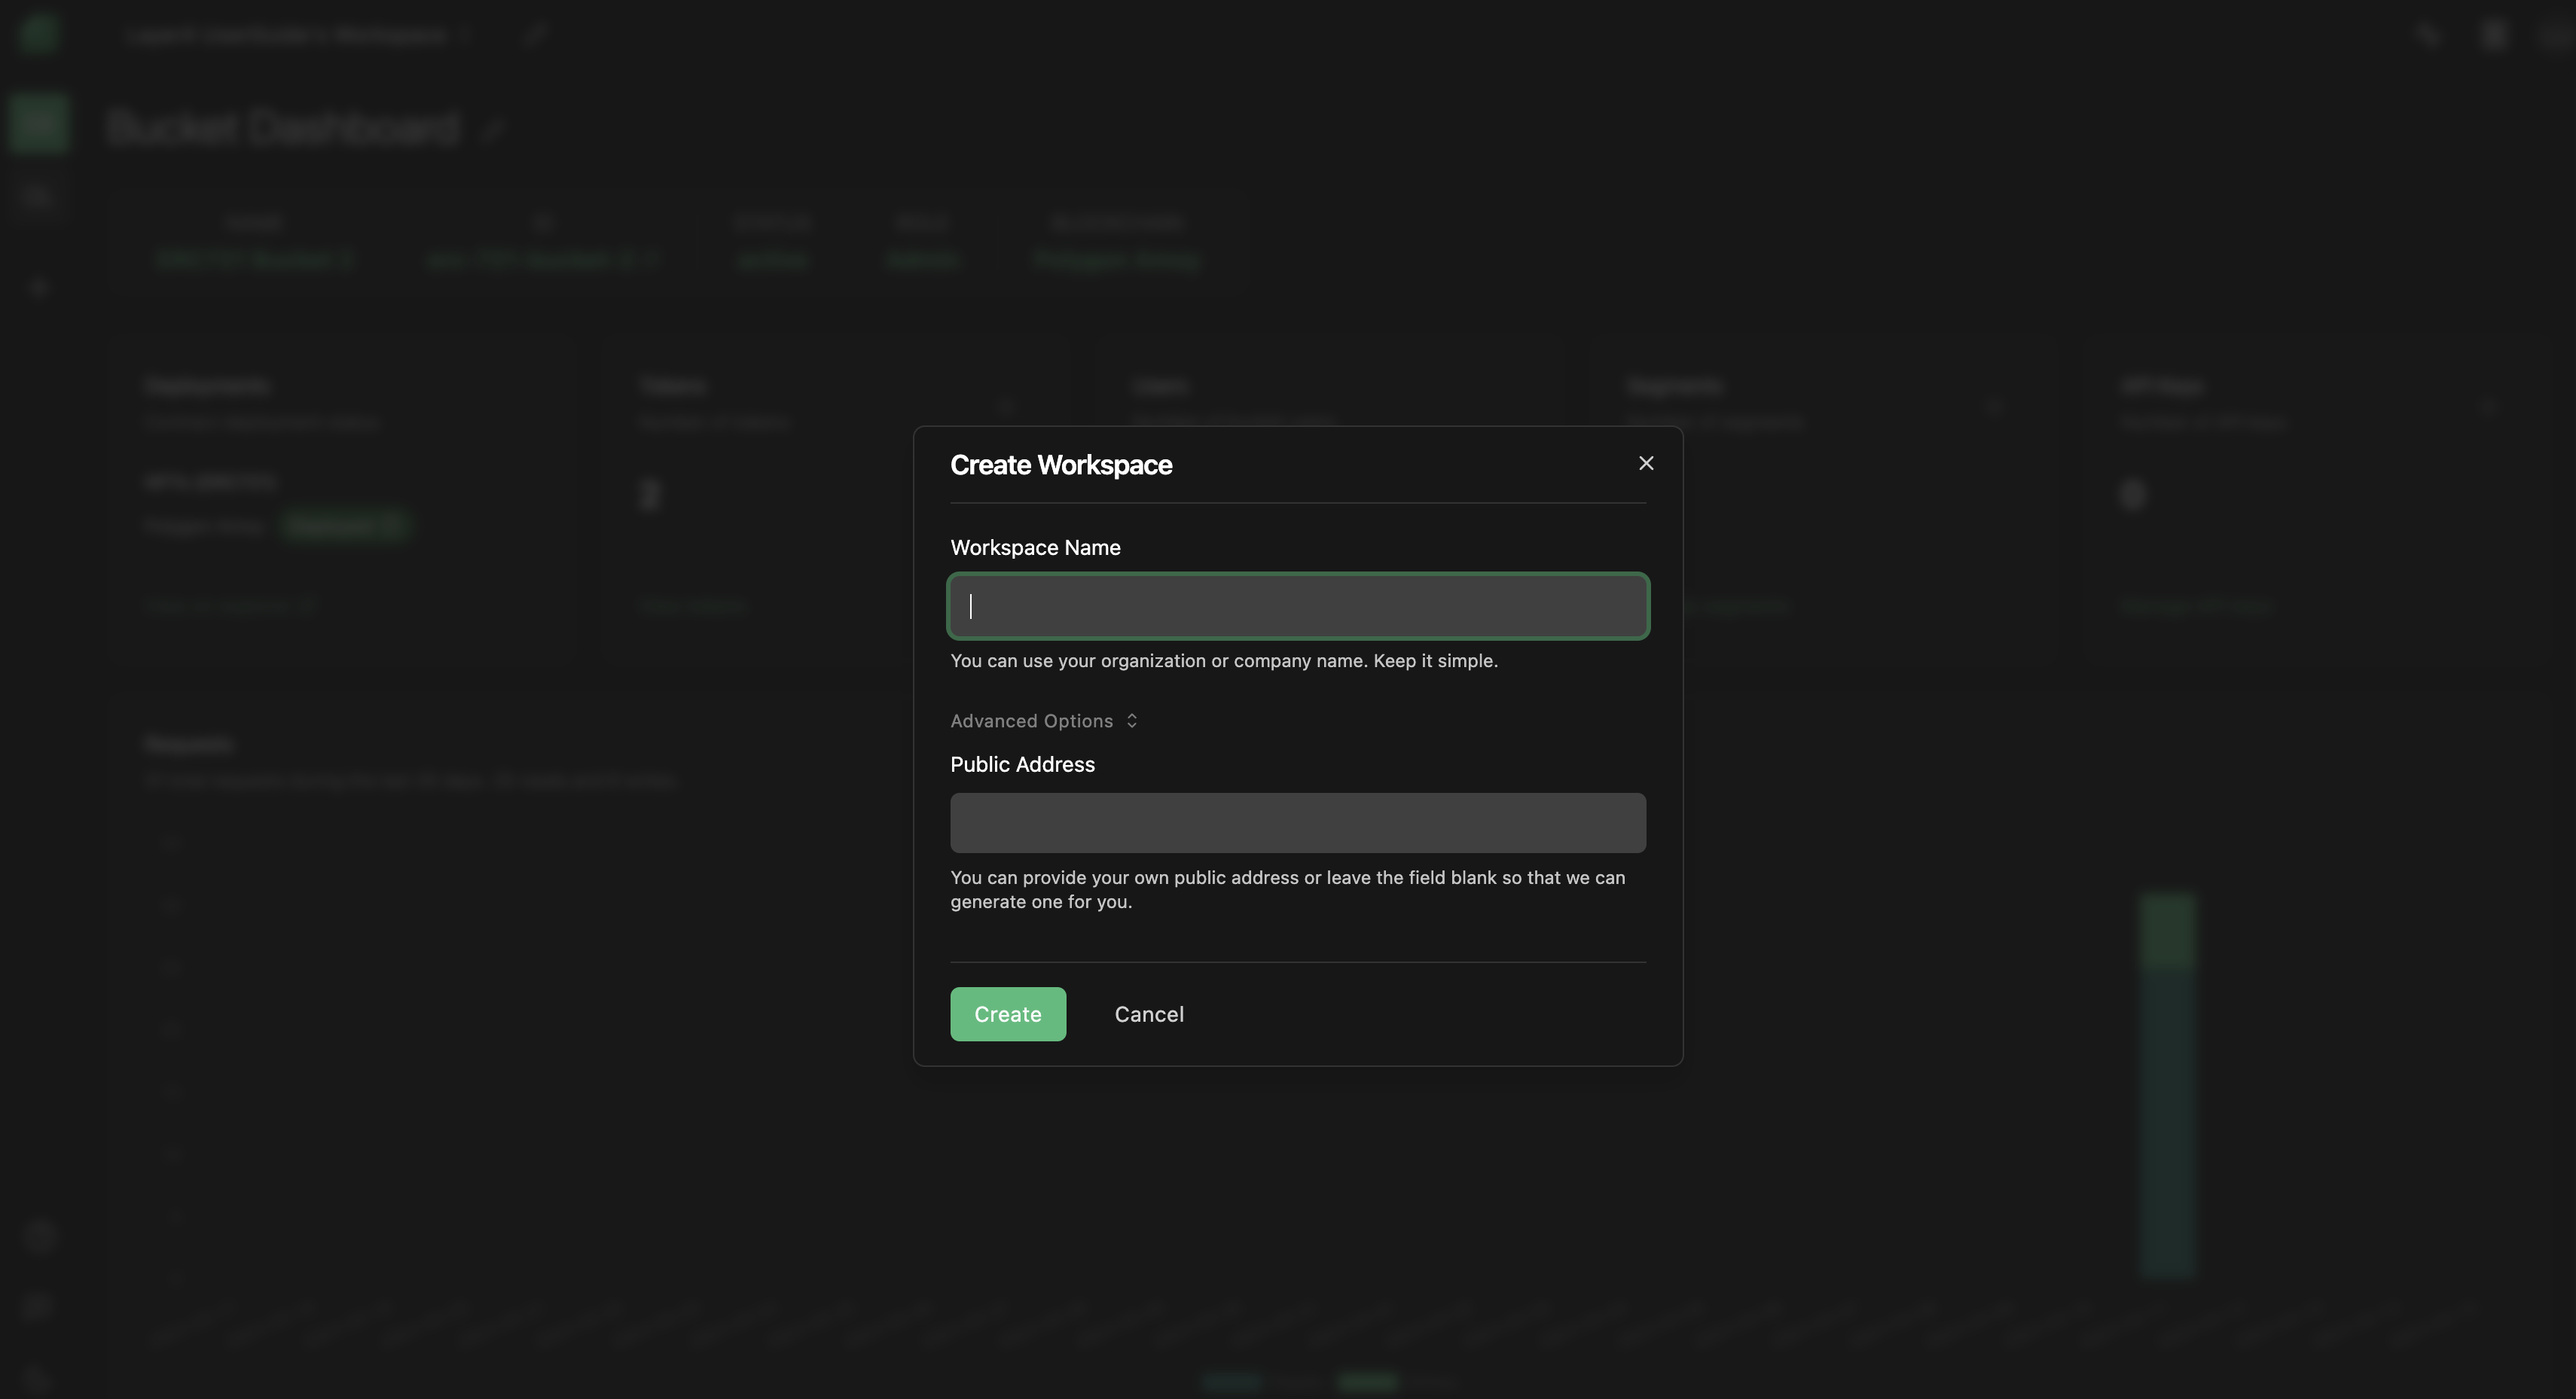
Enter Workspace Details: Fill in the appropriate fields, including the Workspace Name. Optionally, in the advanced options, you can provide a public address.
-
Create Workspace: Once you've entered the details, click on the "Create" button.
Troubleshooting
If you encounter any issues while trying to create a workspace, consider the following solutions:
- Workspace Not Created: If you don't see the workspace you just created listed, double-check that you've saved the workspace correctly. Ensure that you've followed all the steps and provided the required information.
- Browser Compatibility: Try clearing your browser cache and cookies or using a different browser if problems persist.
If you continue to experience problems or have any questions about the workspace creation process, please contact our support team at [email protected] for further assistance.
Congratulations! You've successfully learned how to create a workspace, allowing you to organize your projects efficiently. If you have any further questions or need assistance, feel free to reach out to our support team.
Enjoy using Layer4!