Edit Workspace
This guide provides step-by-step instructions on how to edit a workspace in Layer4, allowing you to modify and update workspace details.
Before editing a workspace, ensure you are signed in and have the necessary permissions.
Edit Workspace
-
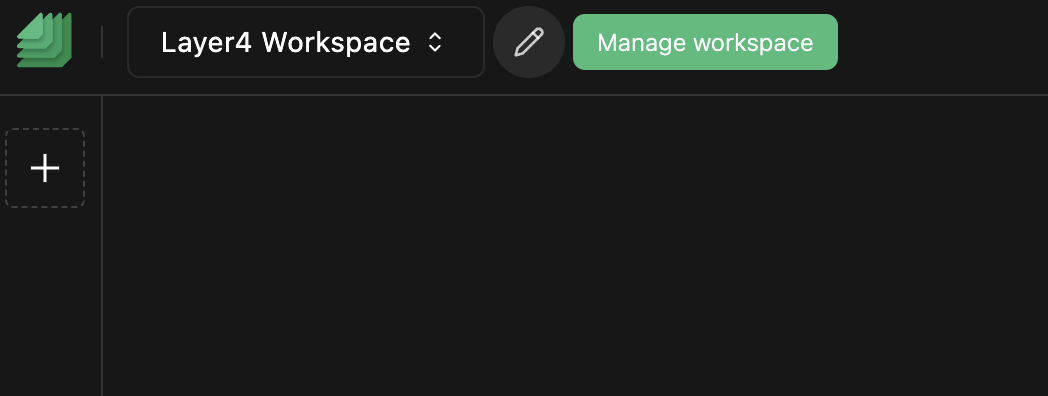
Select Workspace: Begin by clicking on the "Select Workspace" option located in the top left corner of the page.
-
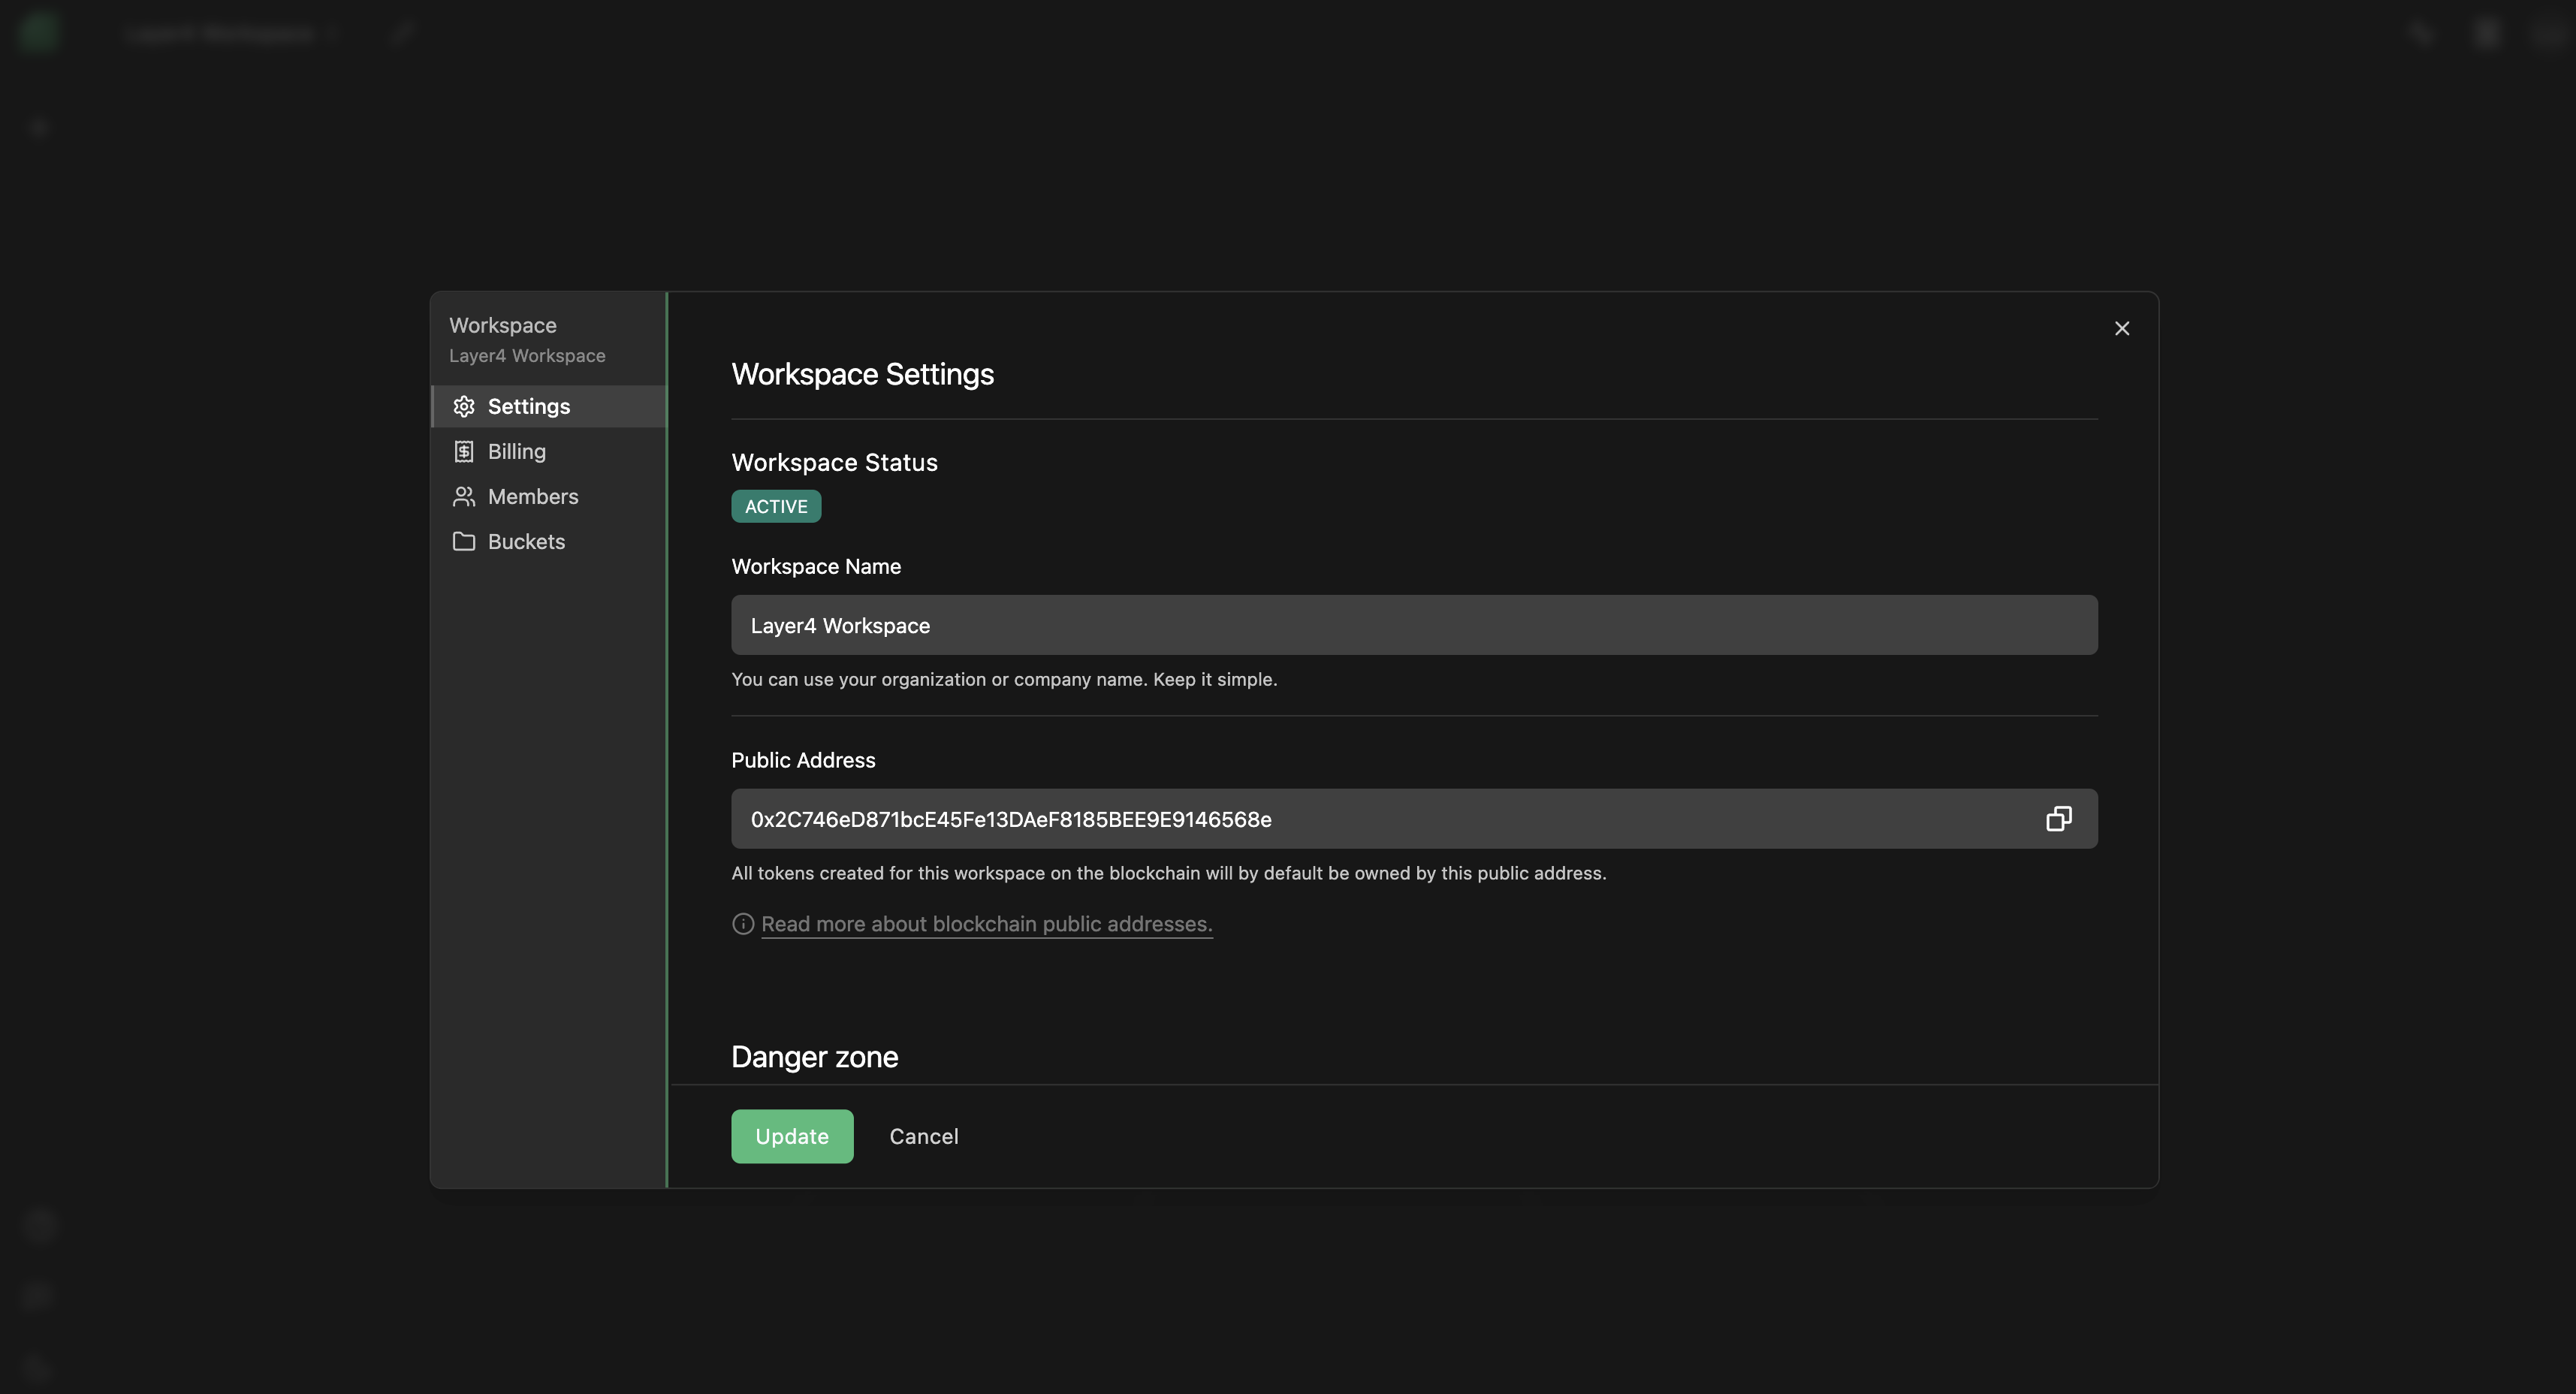
Navigate to Workspace Settings: Once inside the desired workspace, click the pencil icon next to the workspace name in the top right corner to access the settings.
-
Edit Workspace Details: Update the appropriate fields with the new information you want for the workspace. This may include modifying the Workspace Name or other relevant details.
-
Save Changes: Once you've made the desired edits, click on the "Update" button to save the modifications to the workspace.
Troubleshooting
If you encounter any issues while trying to edit a workspace, consider the following solutions:
- Changes Not Saved: If you don't see the updates reflected, double-check that you've saved the changes correctly. Ensure that you've followed all the steps and provided the required information.
- Permission Issues: Make sure you have the necessary permissions to edit workspaces in the selected workspace.
If you continue to experience problems or have any questions about the workspace editing process, please contact our support team at [email protected] for further assistance.
Congratulations! You've successfully learned how to edit a workspace, allowing you to modify and update workspace details. If you have any further questions or need assistance, feel free to reach out to our support team.
Enjoy using Layer4!